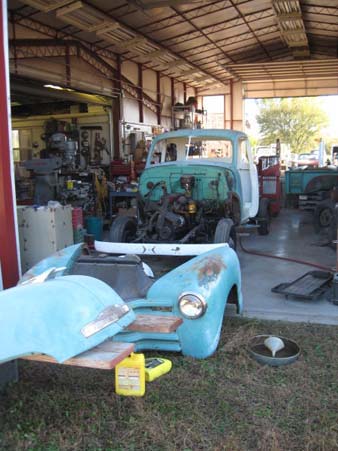
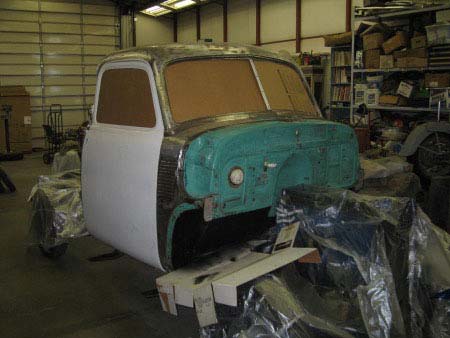
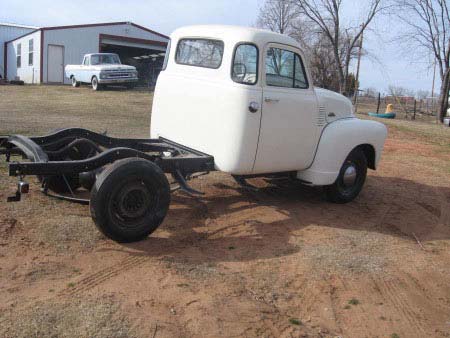
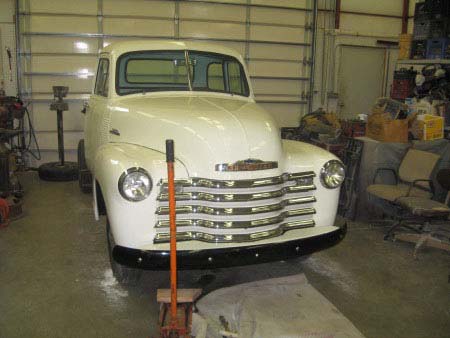
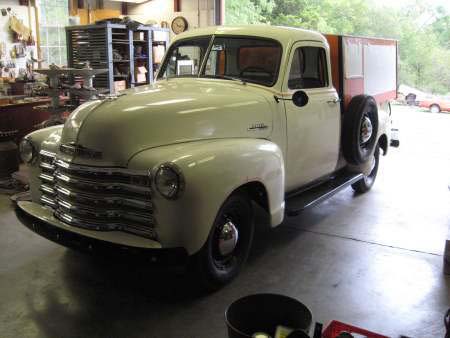
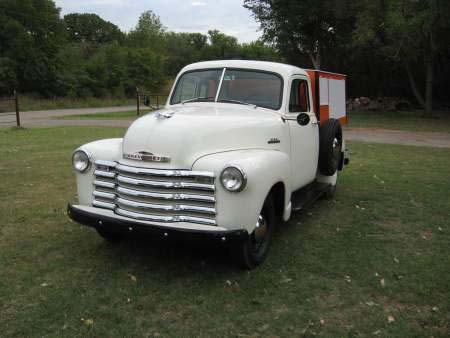
Starting with a fairly solid and original old truck.
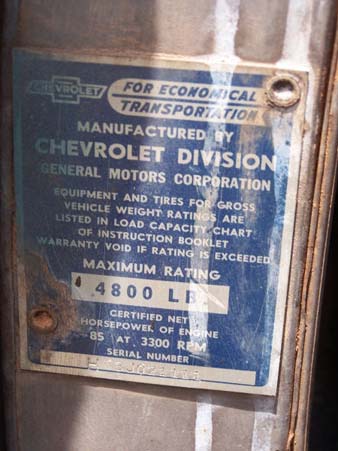
Original VIN tag on the door post shows it to be a 1953 model
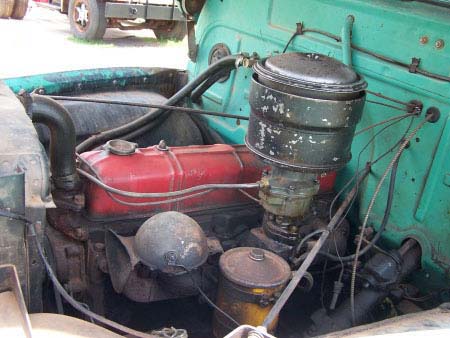
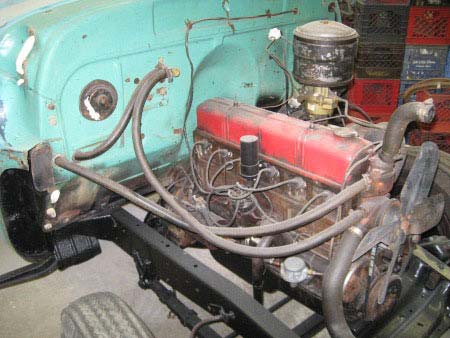
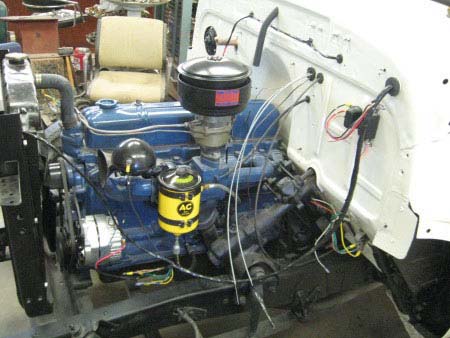
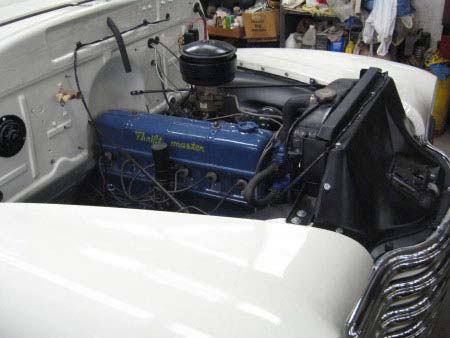
The famous 'stove bolt' six
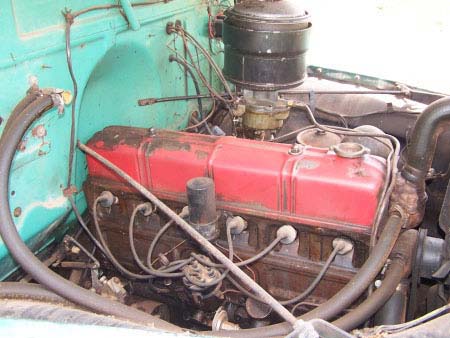
The engine before a carb rebuild and cleaning the fuel tank
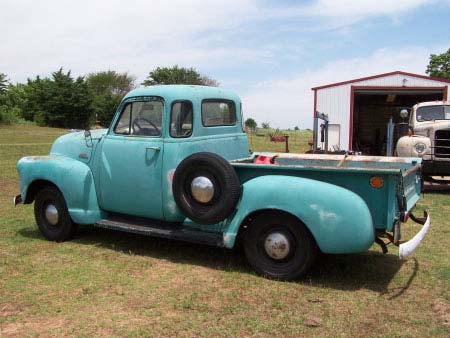
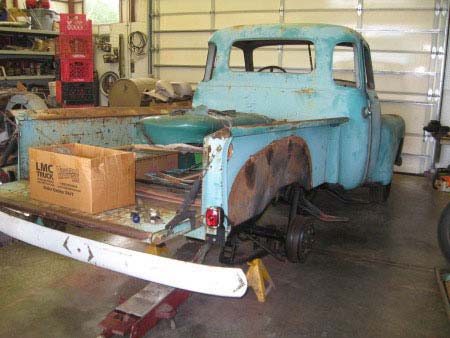
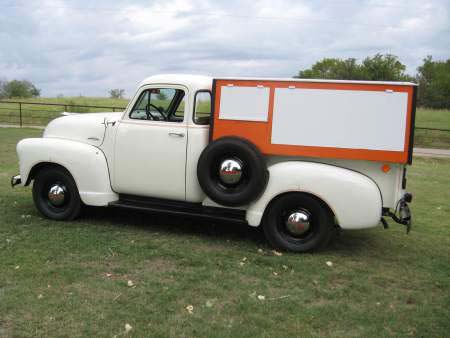
Side mounting of the spare was a popular method of the period
Side mounting of the spare was a popular method of the period
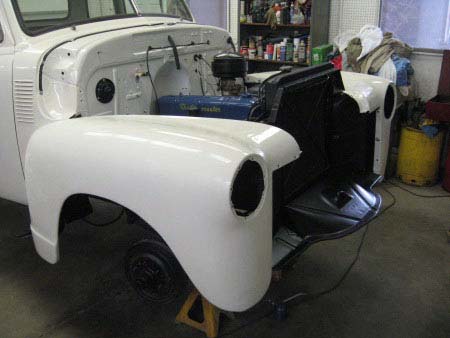
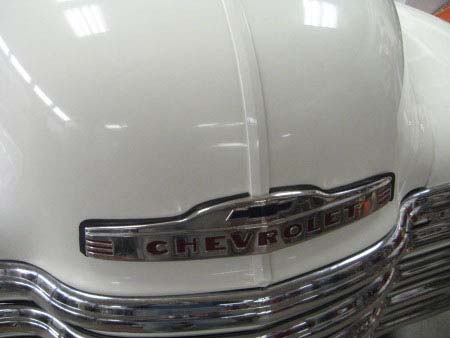
It will look quite smart with fresh paint and cosmetics
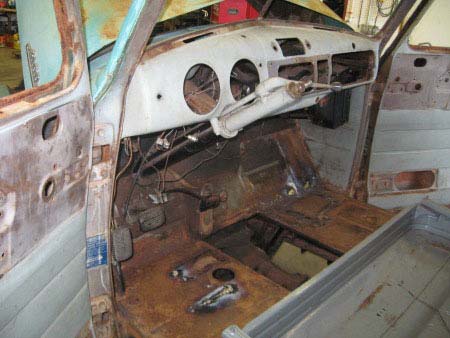
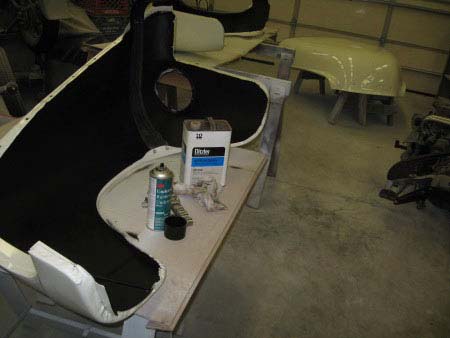
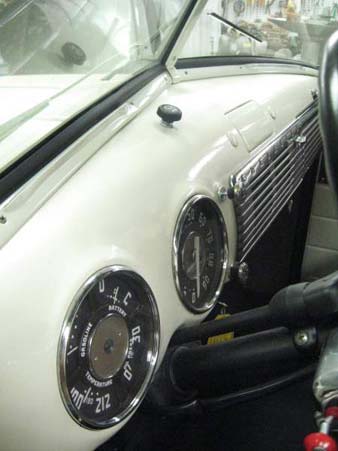
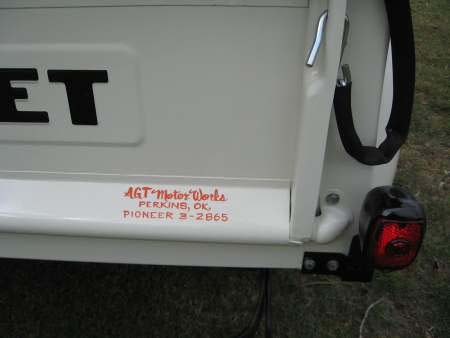
A previous owner had touched up the interior
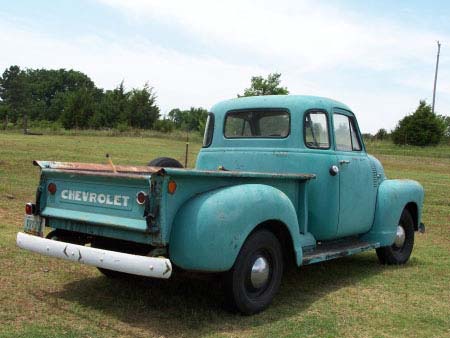
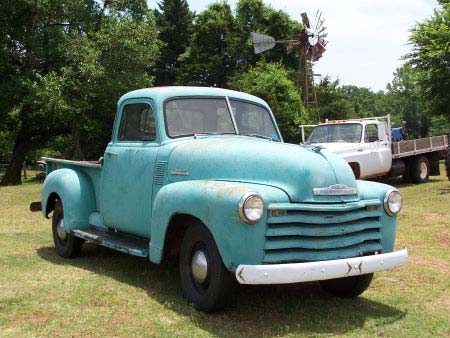
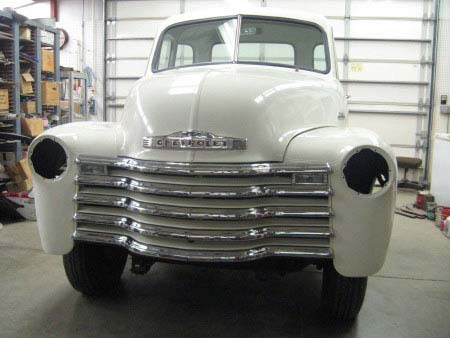
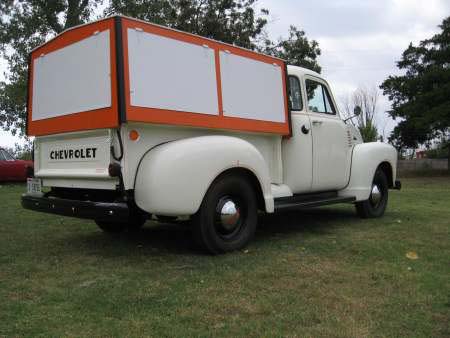
The business end
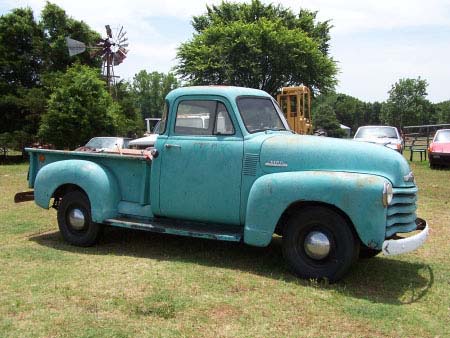
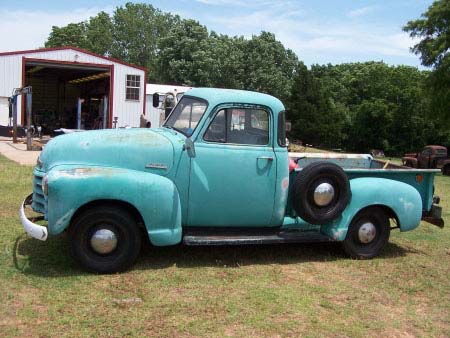
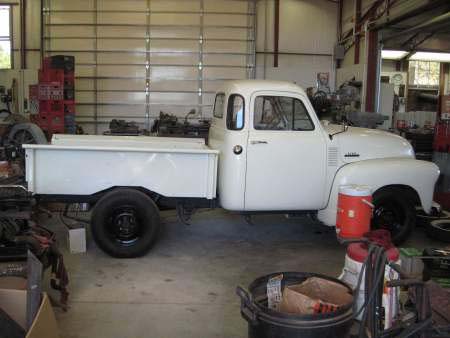
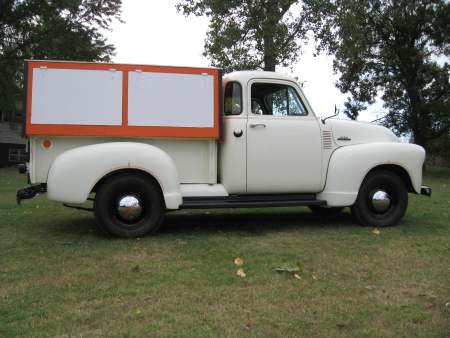
Side view
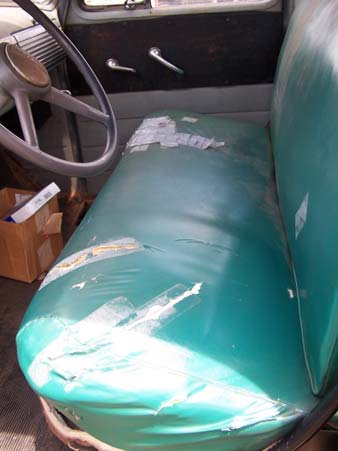
The seat shows some wear but is mostly intact
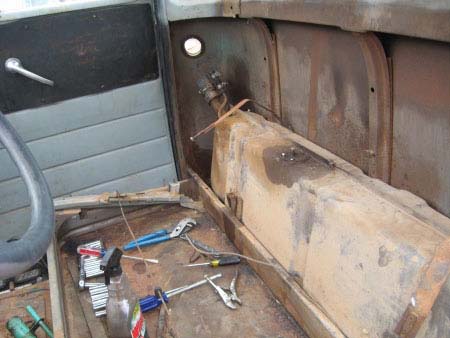
The fuel tank coming out
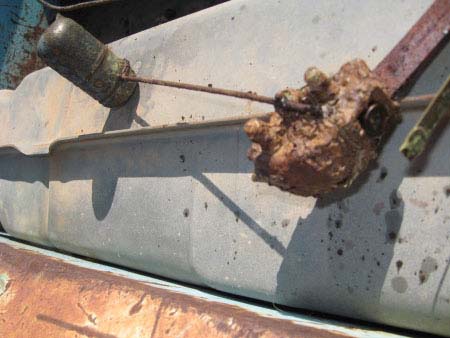
Fuel gauge sending unit gives an idea of the varnish and corrosion in the tank
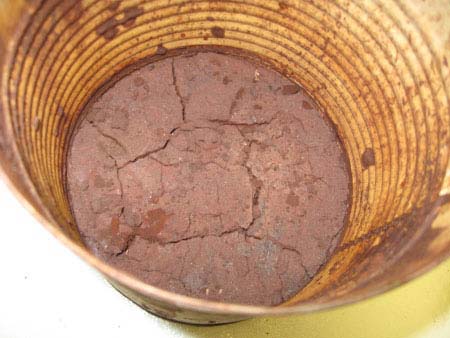
The sludge in the fuel tank filled nearly 2 inches of this gallon can
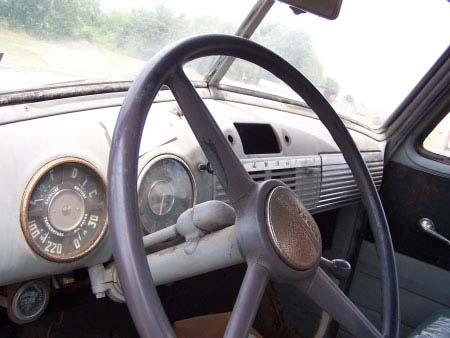
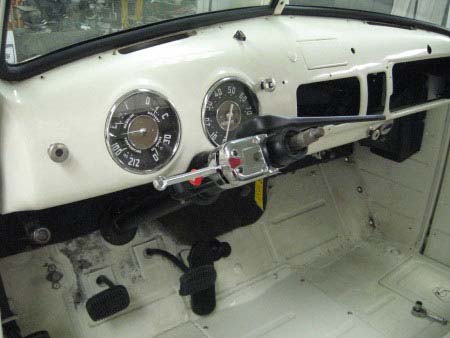
The plan is to restore the interior to it's original business-like simplicity. So far, we've been unable to even find a truck wearing a 'radio delete' plate to cover the radio spot in the dash. Original radios are available but quite expensive and radio may not have been high on a 1950s veterinarian's list of priorities. We may end up making a radio delete cover plate but it would still be nice to see what one looked like!
At this point a 12 volt alternator has been fitted and most of the electrical system switched over. We've added a second tail light and plan to also add turn signals--a period modification for safety's sake. The engine runs, but not as crisply as it should. The vacuum advance on the distributor is not functioning and there may be other issues, but overall it's quite serviceable.
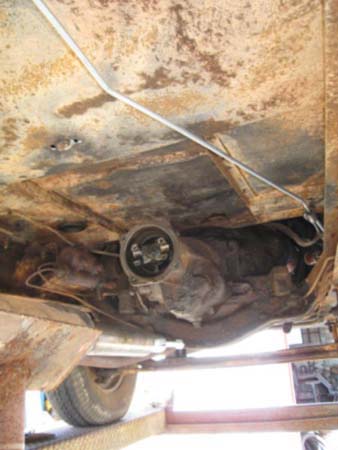
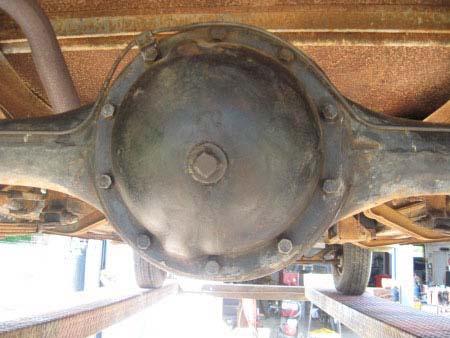
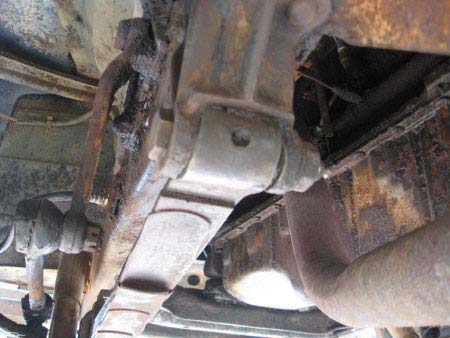
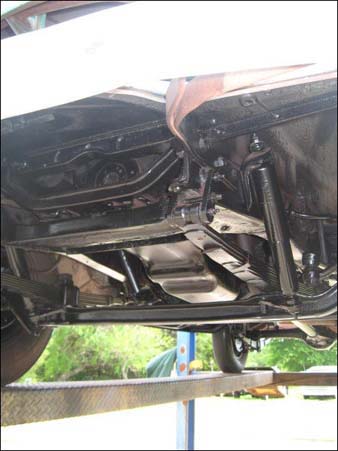
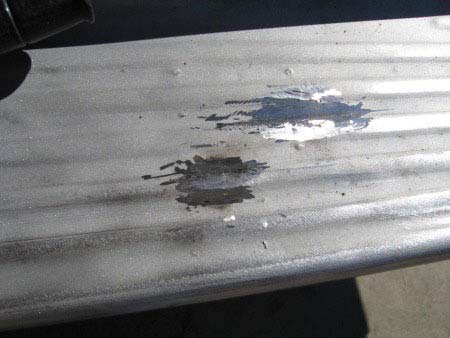
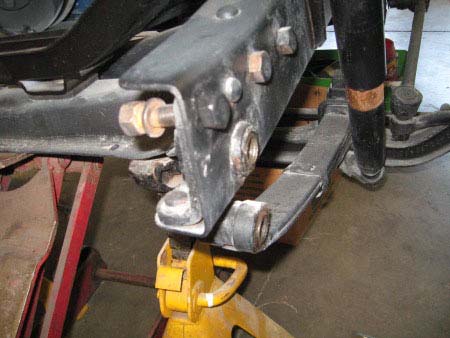
It was determined transmission fluid was leaking out the rear of the transmission, down the torque tube (enclosed drive shaft), and into the rear axle housing--causing it to be overfilled.
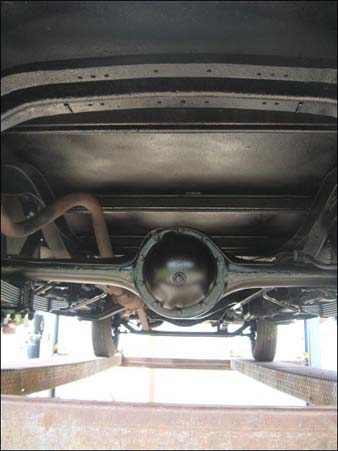
The next step was to open things up between the back of the transmission and the front of the torque tube.
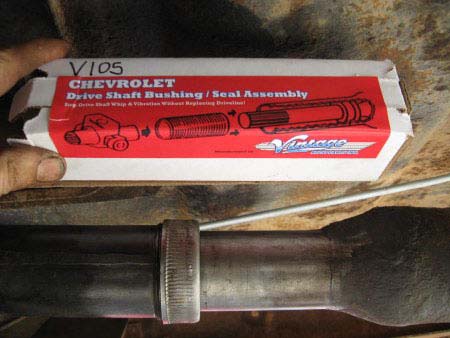
Inside the front of the torque tube the driveshaft rides on two bushings and a seal. When the seal gets old the transmission fluid starts seeping from the transmission to the rear axle. The Chevrolet service manual calls for disassembling the rear axle housing in order to drive the bushings and seal out from the rear to front. The aftermarket has come to the rescue with what's unofficially known as an "Okie seal", making rear axle disassembly unnecessary. The Okie seal is actually a seal and 2 new bushings, made as one complete assembly driven in from the front of the torque tube.
There are two stories about the origin of the name "Okie Seal." The first is that the '"Okies" were the only ones who drove these old trucks long enough to wear out the bushings and seal in the front of the torque tube. The second story claims the reason for the moniker "Okie Seal" is that the aftermarket repair piece was invented right here in Oklahoma. In all likelihood, both stories may have some factual basis.........
Thanks to Bob Adler of Adler's Antique Autos in Stephentown, N.Y. for making us aware of the Okie seal solution.
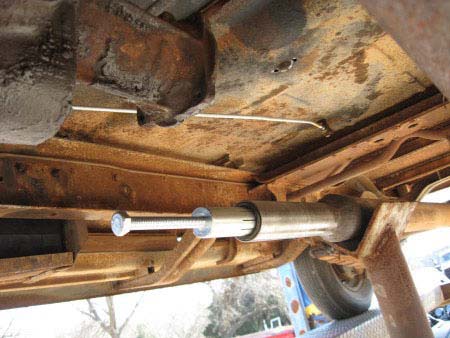
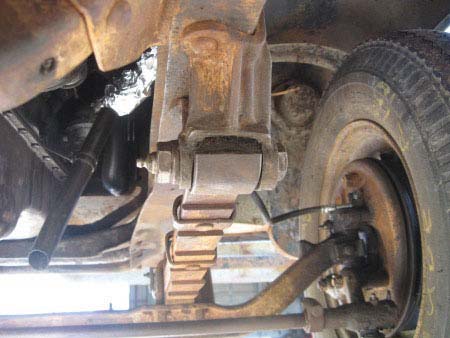
A special tool was required to remove the old front bushing. The beauty of this solution is the Okie seal and bushings fit in front of the original rear bushing and seal. Not only does this make disassembly of the rear axle unnecessary, it also allows the new seal to ride on a new, unworn, portion of the driveshaft.
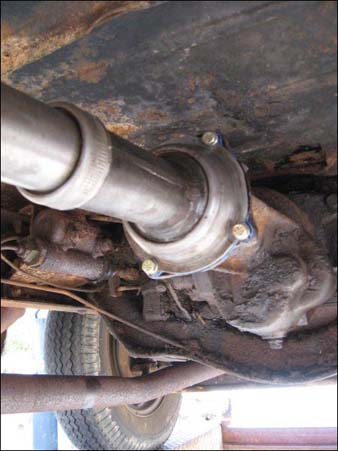
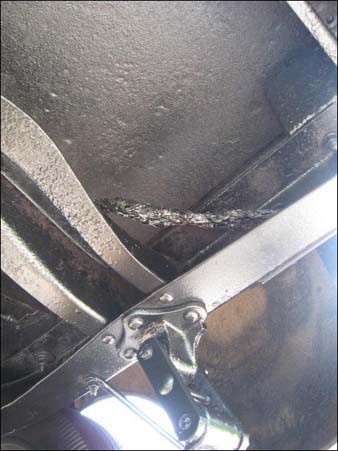
The torque tube bell was sealed with new gaskets and reassembled . The gaskets are referred to as shims and number used determines the fit and mobility of the bell flange. Some staining of the exhaust pipe can be seen where brake fluid had been dripping out of the master cylinder due to old age.

A new master cylinder was fitted. Also, visible is the new transmission mount installed when the crossmember was reassembled. The old one was quite spongy and deteriorated, partly due to the leakage of fluids over the decades. We had originally planned to make new steel brake lines, assuming the old ones would be suspect due to rust. Upon closer inspection it appeared the lines were all in good shape, perhaps able to last several more decades. The rubber brake hoses were a different story. All 3 were replaced.
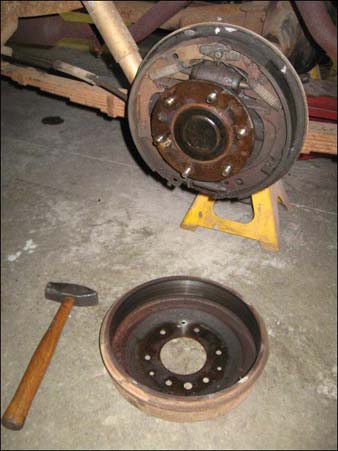
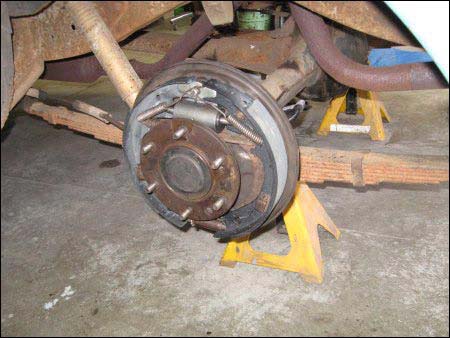
It was initially suspected some of the excess fluid in the rear axle had pushed itself out into the left rear brake drum. Upon disassembly it appeared the wetness there was due to a leaking wheel cylinder. The left front wheel cylinder was also found to be leaking.
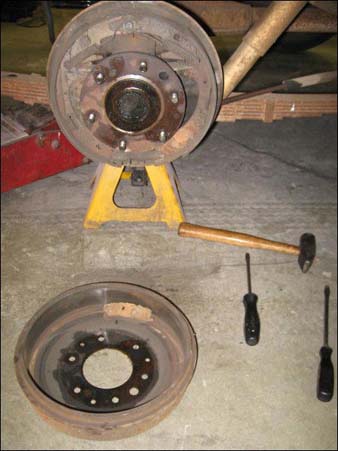
The right rear drum contained a mud dauber nest, originally built on one of the brake shoes. Thankfully, the wetness on this side is just penetrating oil used to get the drum loose from the axle.
All four wheels had nearly full brake shoe linings, appearing to have traveled very few miles since the last brake job. All four drums were in excellent condition, still showing machine marks from having been turned at some earlier time. The rear shoes were replaced with new (unfouled) ones but the fronts were reusable. New wheel cylinders all the way around and unsticking one frozen adjuster will make this truck stop more like it did when it was new.
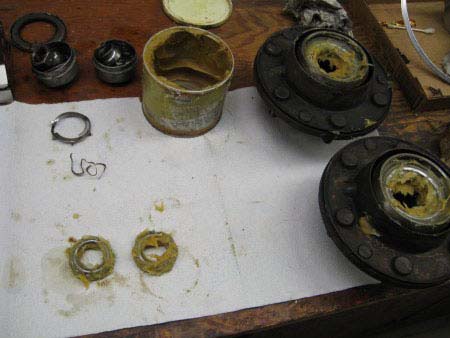
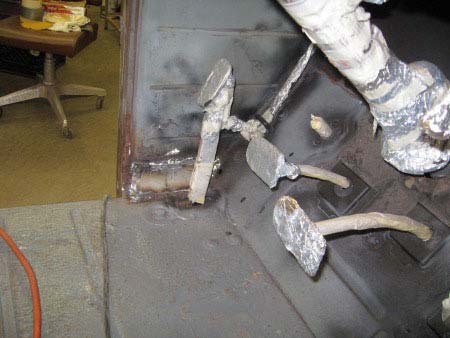
The front wheel bearings are of the ball type rather than the tapered (Timken) type more commonly used today. They were repacked with some old-style fibrous grease we had on the shelf. This particular grease is the type originally used but updated enough to withstand the extra heat generated by disc brakes. We felt this product was a good compromise between the old and the new.
The 3 shiny steel pieces in the upper left were 'spare parts' found inside the left front dust cap. No other damaged pieces were found so it appears these may have been overlooked some time, perhaps when a bad wheel bearing was replaced; Another good reason for always putting things together "clean." All ball bearings and races were in excellent condition.
The front hubs were installed and the spindle nuts torqued to 33 ft lbs, as specified in the factory service manual. Now the truck should go safely down the road. It's time to take another look at getting it running better. We still need to see why the vacuum advance in the distributor isn't working right. We're planning to update to electronic ignition and a higher voltage coil. This should help some with easier starting since the truck will be expected to spring to life relatively easily despite intermittent use. Along those same lines, we're contemplating fitting an electric fuel pump to push fuel up into the carburetor for initial starts. This will minimize the effect of the carburetor 'drying out' when sitting for more than a day or two between assignments.. The truck will most likely be asked to start and run dependably by a variety of drivers, most of whom won't want to deal with too many 'eccentricities.'
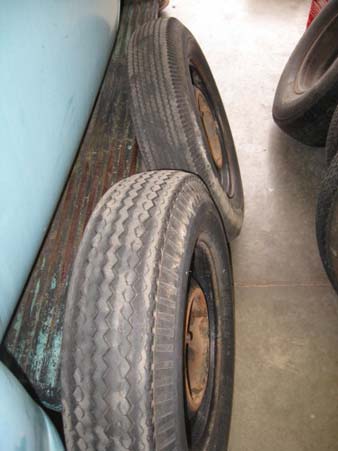
The old bias-ply tires looked pretty good at first glance although the rears are 6.00 X 16 and the fronts 6.50 X 16.
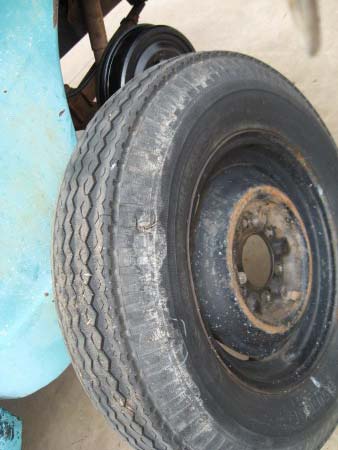
Upon closer inspection it can be seen the front tires had been run underinflated, causing the outer portions of the tread to wear more than the centers. The sidewalls show some wear and tear in the form of cuts and bruises. The tires were rotated front to back after the brake job. Driving after that, the truck's steering wheel began to shimmy uncontrollably approximately 40-45 mph. The tires were rotated back, the steering linkage and front suspension were carefully checked for excessive play or looseness. The only significant play was in the steering box itself. The sector gear in the steering box was subsequently tightened approximately 7/16 of a turn in the middle of it's travel,as per the factory service procedure. After that it appears the likely cause of the shimmy is the old tires themselves.
For now, we'll go on with other issues of the restoration. If new tires at the end don't solve this challenge, we should be able to do whatever is necessary without interfering with fresh paint and cosmetics.
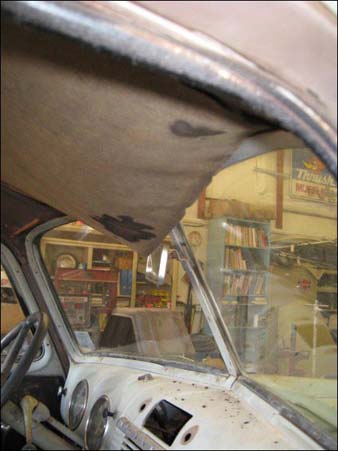
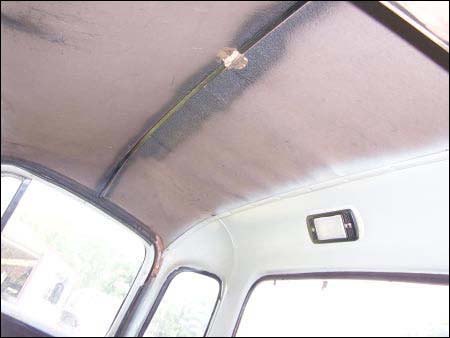
Driving the truck also caused the headliner to begin to fall down.
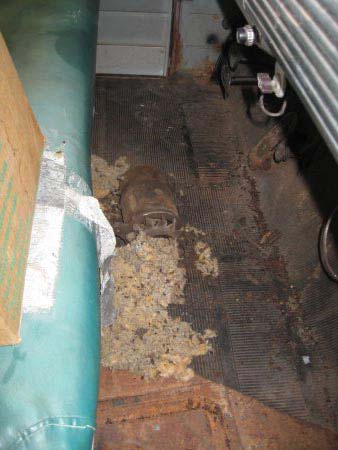
It appears a mouse once used the area above the headliner for storage and/ or living quarters.
Contents of the 'mouse house' as they laid on top of the headliner. Not a problem as the interior will be stripped anyway prior to refinishing.
The driver's door made an awful noise every time it was opened. It was rubbing the fender at the bottom.

The rear of the driver's door had a better gap, but looked a little weird.

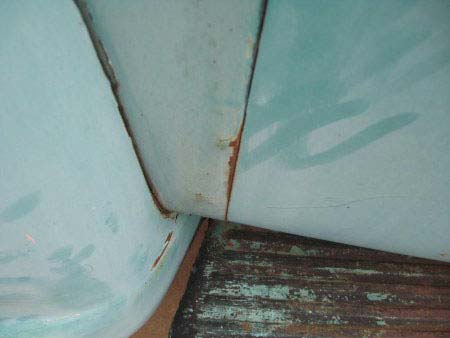
This corner of the cab sustained some collision damage sometime earlier in it's life. The striker plate and hinges were adjusted. Some minor panel adjustment at the front of the door provided enough clearance to eliminate the awful rubbing sound.
The body work on the door post was not really finished. We used a grinder to straighten the edge and see what's there. The cab corner is a little 'fat' the way it was finished out with plastic filler. We'll reshape that somewhat as part of the bodywork process in preparation for painting. For now, the door opens and closes as it should without making any unusual noises and that's what we're after.
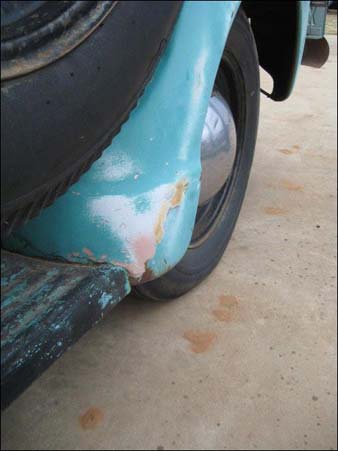
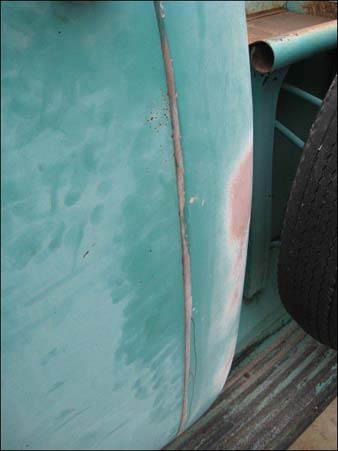
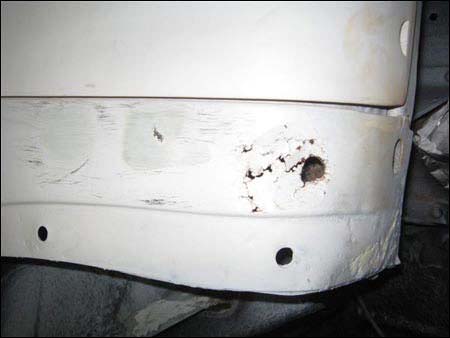
The bottom front of the left rear fender exhibits some more evidence of earlier repair. Nothing to be afraid of--this is just a good time to be looking ahead ...

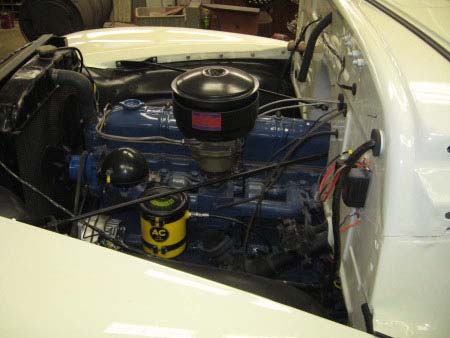
The engine is starting and running better all the time. The electronic ignition and high-voltage coil make for strong, crisp initial start-ups. Most of what's left in this area should be cleaning, painting, and detailing.

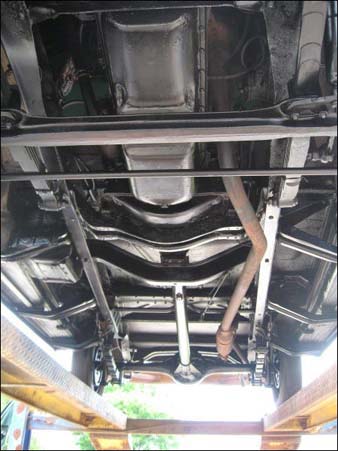
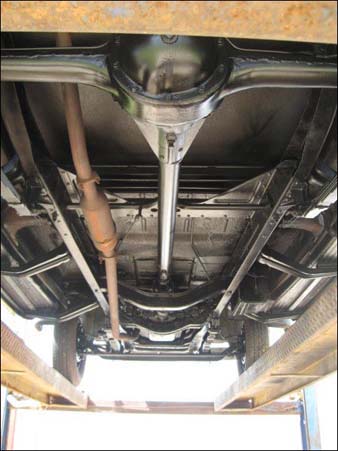
A decision was made to clean up the chassis and underside of the truck. While this isn't intended to be a concours ("white glove") restoration, it is intended to be a 'show' truck to a level worthy of a spectator's attention.
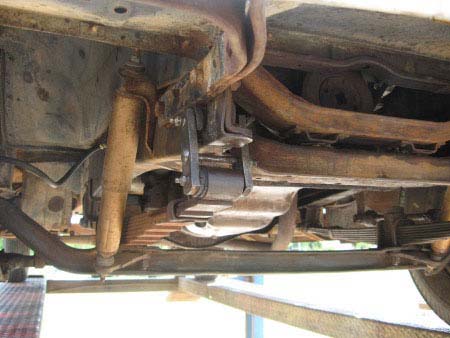
The first step was determining the scope of the clean-up. Our powder coating friends would have us disassemble the entire truck. They would then bake each piece in an oven, cooking out all the oils, greases, and other contaminants--yes, even the frame!!!--then sand blast and powder coat. In this case that would be overkill. Nearly 60 years is a long time to accumulate rust and caked-on grease. We decided to scrape and pressure wash as much of the underside as reasonably possible. Special attention was paid to the axles, springs, and spring shackles as these are what one notices most underneath when walking up to an old truck.
After two sessions of scraping and pressure washing some spots of grease and gunk remained, some as hard as wood.
A little more cleaning was done in the obvious areas by washing with solvent and scrubbing with a wire brush.

Finally it was time to spray some Rustoleum 'Rusty Metal' Primer. We've used this on a number of vehicles. The Rustoleum is an oil-based paint. It's not affected by the inevitable oil and grease still in the nooks and crannies. The parts-washing solvent we scrubbed with is an acceptable product for thinning the Rustoleum to spray, so no compatibility issues. Adhesion and durability are good without sanding unless applied over shiny paint.
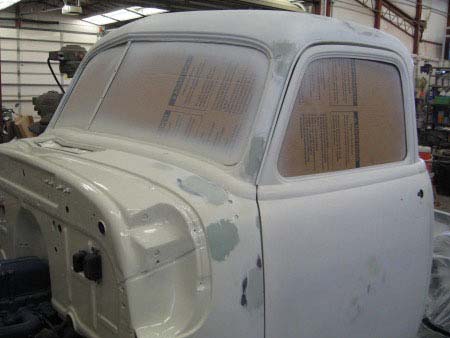
Even in primer, just being all one color makes it more pleasing to the eye.
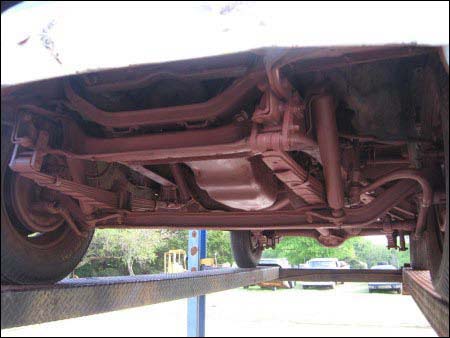
After priming, ambient temperatures were low and humidity was high so we gave it more than the recommended 24 hrs. to cure fully. As it turned out, we had to wait ten days for an appropriate day and little wind. Top coating was then done with Rustoleum semi-gloss black. Still in the oil-based line this semi-gloss gives a nice balance between (too) glossy black and flat black. Some call this shade satin black. High end specialty paints this shade are sometimes even called "Chassis Black". Whatever the name, this is the same color vehicle manufacturers use to protect parts from the elements without trying to make them stand out visually.
The exhaust was the only thing left unpainted, since this paint would eventually burn back off, but not uniformly.
Close inspection reveals the pits are still in the metal but perhaps the rust will be suitably retarded for another 50 or 60 years! The suspension and axles are at least presentable from a distance now. Note the use of tin foil for quick, unobtrusive masking of the tail light wires.
Any spots missed or damaged in subsequent operations will be easy to touch up now. Cleaning up & painting the underside is a dirty, messy job. One is always working overhead and things are often falling, dripping, or misting down. The most difficult part is resisting the urge to make every inch so perfect one would be willing to eat off it. That said, the result overall presents a more professional, finished look.

The interior needs to be stripped and prepared for refinishing.
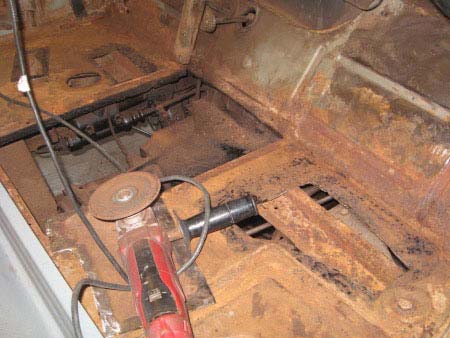
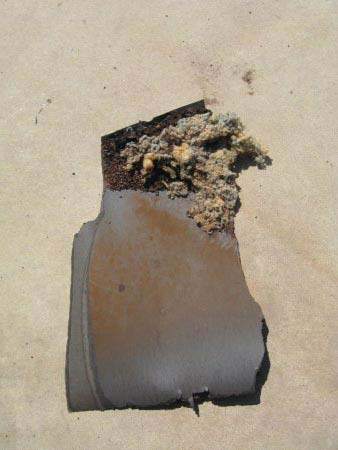
Removal of the floor mat revealed some relatively minor rust holes. Those floor areas were then cut back enough to ensure only solid metal remained. The center cover over the transmission was a little more like swiss cheese. Fortunately, a reproduction is available that will be like new.
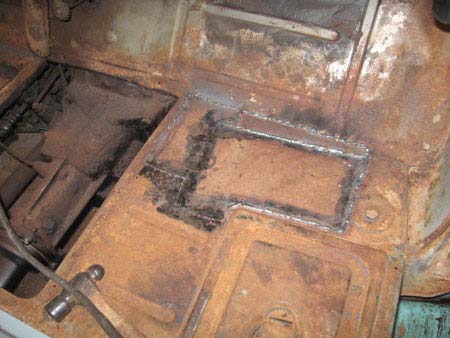
Patch panels were then fabricated from metal of the same gauge and welded into place.
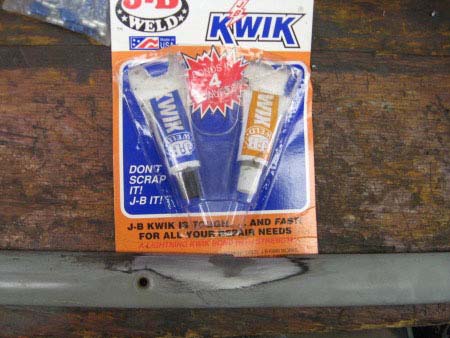
Some of the interior pieces will be powder coated. Two window garnish moldings each had a small crack. The powder coaters recommend JB Weld to repair the cracks. The JB doesn't warp the repair area, will supposedly withstand the heat of the cleaning and curing ovens, and will conduct electricity for the powder coating process. A larger area is prepared and patched, then finished back to make sure no original paint remains under the repair area.
The dash was carefully disassembled and all wires marked for easier reassembly. The vent windows, glass runs, window regulators, latches, handles, etc. have been removed from the doors. All 9 pieces of cab glass were removed during this process.
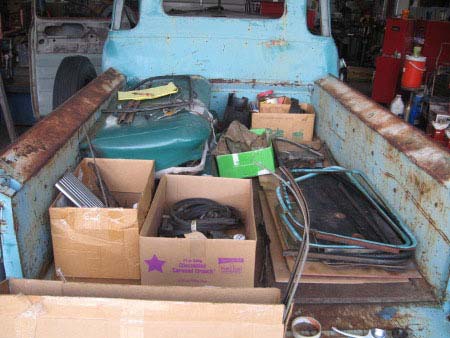
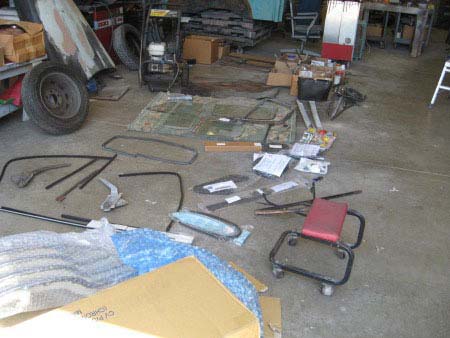
The interior parts were examined and organized after removal. A list was made of items either missing or needing replacement.

Running board removal required cutting off most of the bolts. Fortunately they're a type of thin-headed carriage bolt that should be available through one of the many restoration suppliers.
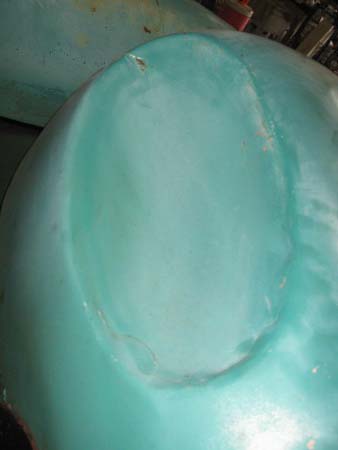
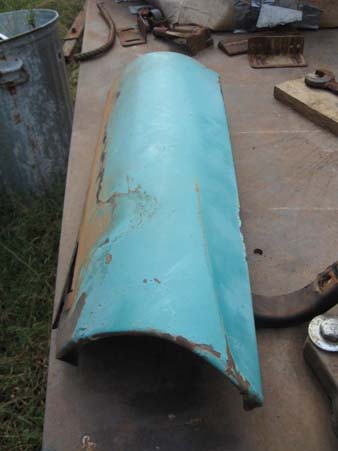
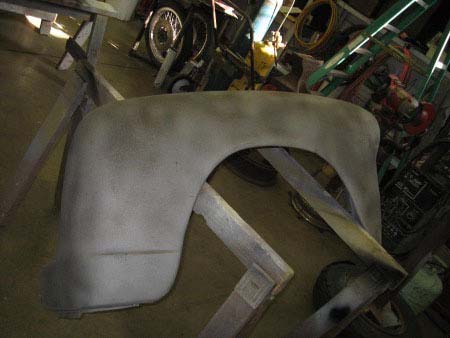
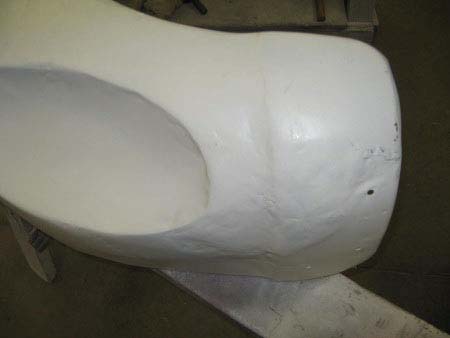
Removal of the spare tire revealed that the fender relief had been home-made. This will be fairly easy to clean up when re-finishing the fender.


The dash, door jambs, headliner area, etc. were stripped to bare metal.
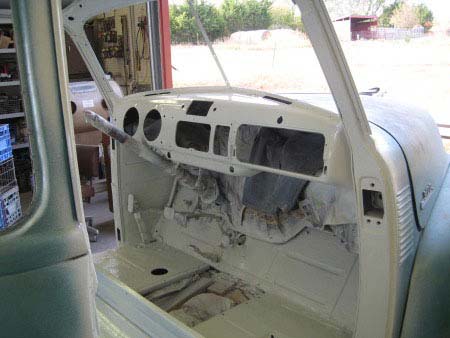
The interior got 2 coats of epoxy primer, then the original '53 Chevrolet truck white in single stage PPG enamel.
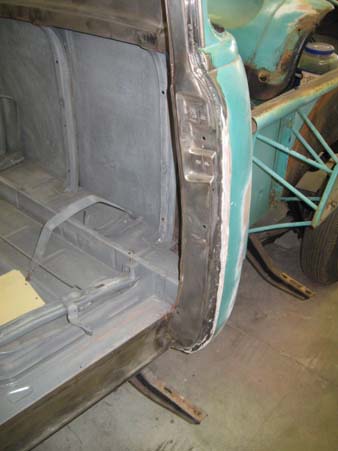
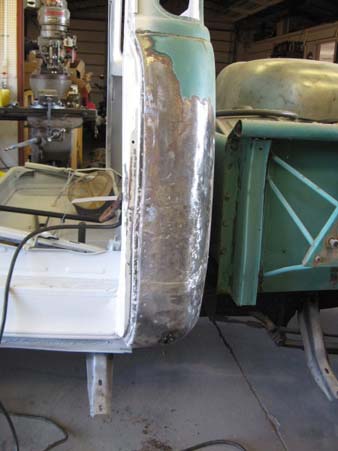
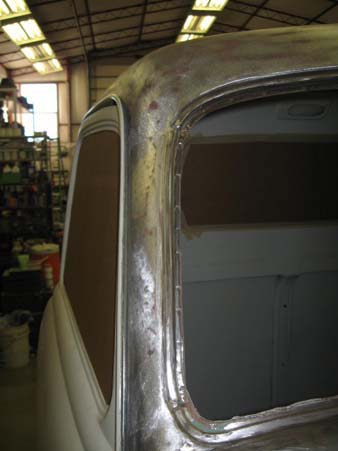
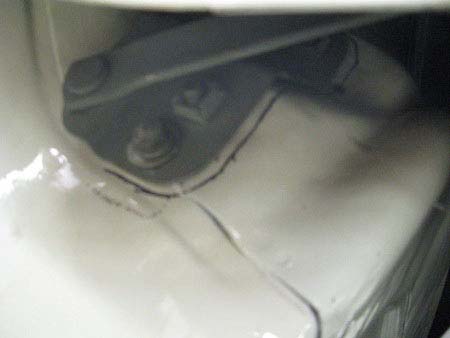
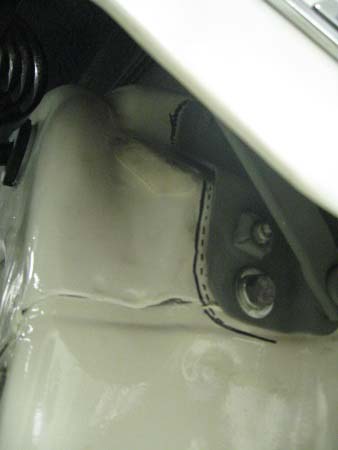
The left rear cab corner had been damaged all the way to the door post. It looks a lot better after stripping and some straightening. The finish work will be done to match the door after it's reinstalled.
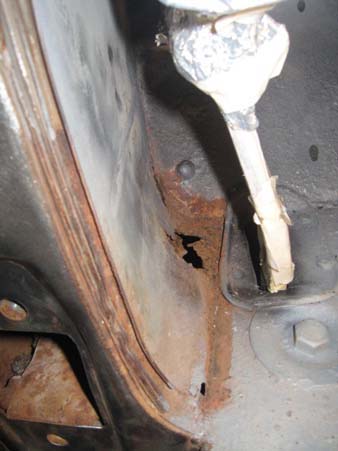
A few more areas of rust damage were discovered while preparing the cab interior for paint.
Various layers of repair materials on the left rear fender were undoubtedly related to the collision damage on the cab corner.
The fenders were stripped by a combination of sanding, grinding, and sandblasting. Only the front portion of the left rear fender had any significant damage. The previous metal work on the spare tire relief was quite nicely done, even though not at the factory.
The apron that bridges the gap between the left side of the bed and the running board was bent as well.
The front clip (fenders, inner fenders, radiator, core support, and grille) was removed as a unit. That will greatly facilitate refinishing of the firewall. engine area, and the sheet metal itself.

In cleaning up the engine & front chassis area it became apparent we'd need a steam cleaner to have any hope of removing the accumulation of caked-on dirt and grease. In the meantime, there are plenty of small parts needing attention. After sandblasting the running boards were seen to be quite straight with only minor rust areas.

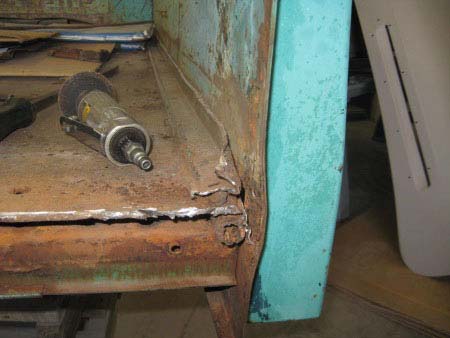
The rusted out areas were welded up, then ground back closer to the original contour of the stamping.
A little careful grinding makes it where the final body work will be minimal.
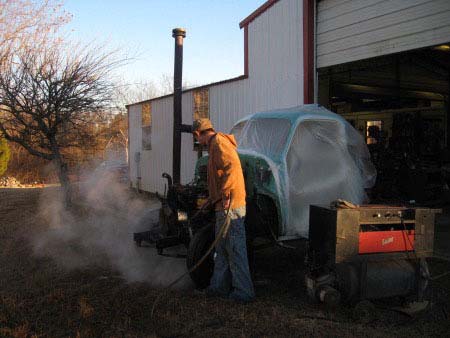
Steam cleaning is different from pressure washing; more heat, less pressure. The cab was sealed with plastic sheeting and rags in miscellaneous openings. A little time and patience pays big dividends here.
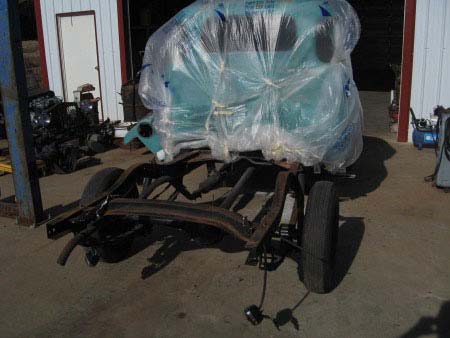
This was a good time to paint the top of the exposed frame rails, front and back while the cab interior is still protected from the steam cleaning operation.

The hood was mostly sanded by DA to avoid warping.
The front fenders had enough shape to them to allow sandblasting. There were a few areas of plastic body filler, but all related to dents--not rust.
The semi-gloss black on the chassis will look very clean when the front sheet metal is built back. Next is cleaning and preparing the engine and firewall for paint.
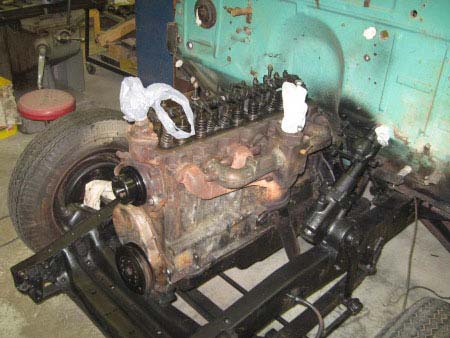
Nearly all external parts were removed from the engine block for painting and detailing.
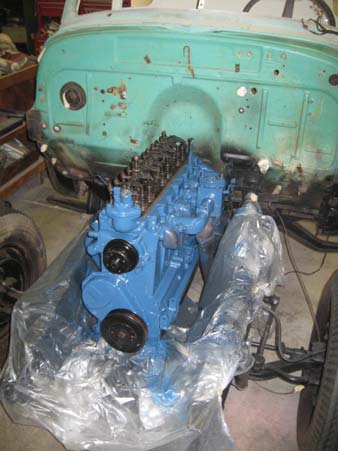
The Paint Place (thanks Brad) was able to come up with the paint code for the original blue used by Chevrolet for truck engines in 1953. The contrasting colors give a tiny hint of what's to come!

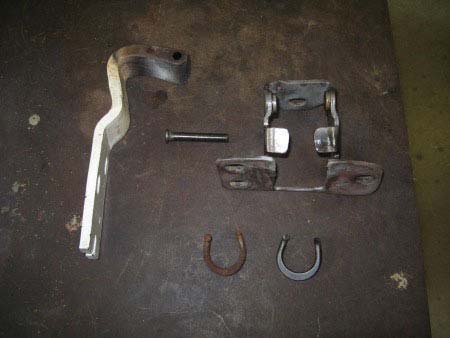
The door hinges are a good illustration of the challenges in doing good restoration work these days. The old driver's door top hinge was severely damaged. A used one was obtained but it took both hinges to make one usable one. We had planned to use new reproduction hinge springs due to wear and slop in the old spring ends. The reproduction springs were over .020 in smaller diameter wire and a looser fit than the worn originals. Shimming the original springs with washers gave a better result than using the "new" parts.
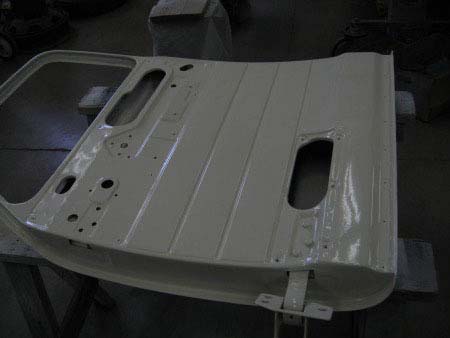
The insides of the doors, door hinges, transmission tunnel and battery covers were all painted to match the rest of the interior.
All the cab but the firewall was sanded to bare metal. It was important to get the window openings clean and free of rust. The firewall needed some minor repair down by the floor. The rest was in very good shape and the original finish cleaned up well and still had excellent adhesion. Between the steam cleaner, DX330 degreaser, and sanding with 320 grit it took paint very well with no evidence of fisheyes.

The cab was then given two wet coats of epoxy primer.

The firewall was sprayed with the same original Chevrolet white. Three coats gave good coverage and a nice gloss. Next up will be smoothing out all the little dings and dents in the cab and reinstalling engine and firewall components.
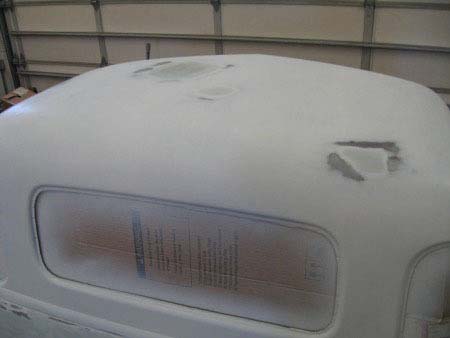
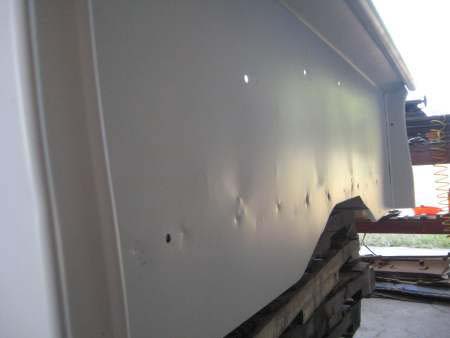
Major dents were worked by hammer and dolly before the epoxy primer. Smaller dents were worked after the primer was in place. A couple rust spots were found that hadn't been obvious. In this case tiny pin holes were opened up considerably before getting back to solid metal, necessitating welding in a metal patch.
Numerous small dents and imperfections required attention.
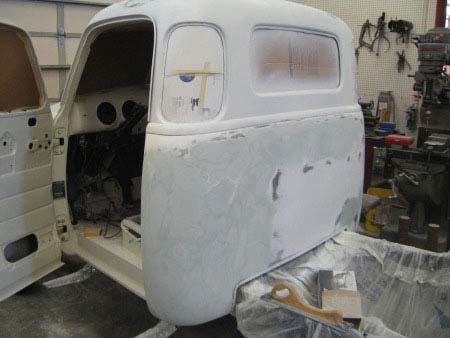
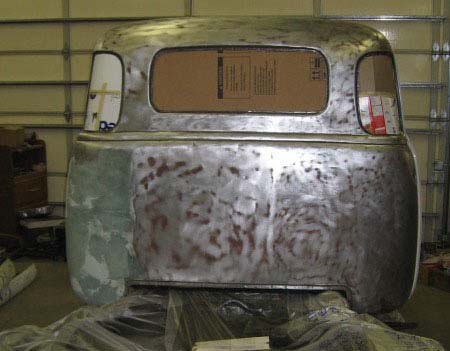
The rear of the cab seems to take a beating in almost any pickup. After the individual spots were worked a skim coat of body filler helped smooth the overall contour. Here it's all sanded to 80 grit. Next will be 180 grit over the entire cab and 3-4 wet coats of primer surfacer filler.
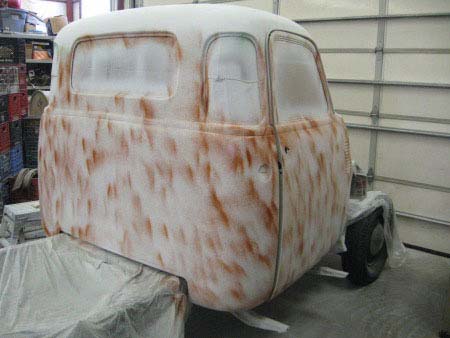
The cab was sprayed with primer-filler which is a modern, heavier version of primer-surfacer. A spray can of brown lacquer was used to dust a light 'guide coat' on top of the primer.

The guide coat was then block sanded again with 180 grit. The guide color is nearly all removed, leaving brown only where there are low spots or other flaws that aren't easily visible to the naked eye. Those same flaws, however, would be magnified when sprayed with shiny paint if left as they were.

This fender has been primed, guide coated, and block sanded with 180. Some of the layers end up microscopically thin. The picture gives an idea of the subtle reworking necessary to iron out nearly six decades of acquired wrinkles.
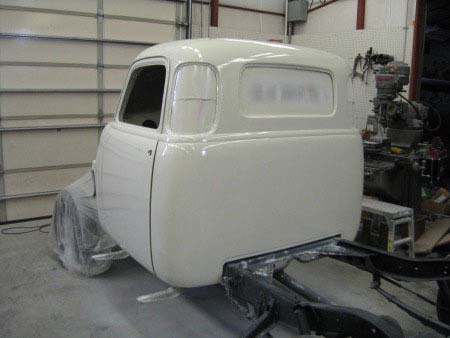
The cab exterior was sprayed with 2 coats of sealer, then 3 wet coats of single stage color. After one week it was color sanded to 1500 grit. It was then machine polished with fine compound and then swirl remover, using two different pads to avoid contamination by the coarser grit.
Next is turning our attention toward reassembly, beginning with doors, glass, and other cab and engine hardware. Here is the initial layout to compare the old pieces with the new. Unfortunately, very few reproduction parts are identical to the original. Therefore nothing is discarded until the new item is in place and functioning.
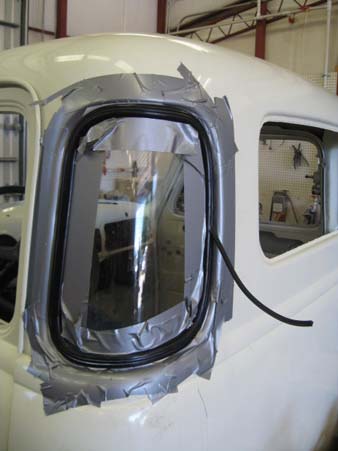
The cab corner windows were in excellent shape to re-use. All other glass was cloudy and new pieces were cut locally for considerably less than the aftermarket catalog prices. The corner windows went in with the rubber trim fairly easily. The challenge was the lock bead that goes in the center of the trim to hold everything in place.
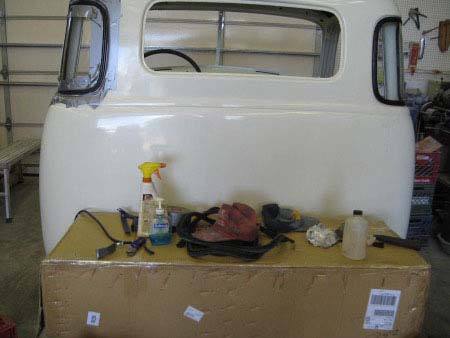
We tried Armour All, glycerine, and dish soap--all to try getting the lock bead to slide more easily into the rubber trim.

Bob at City Glass showed us a homemade tool he uses on the lock beads of old rubber trim like this. We made two attempts to duplicate his tool. The one on the far left was made from a plastic trim tool. The middle one was made from a nylon body pry tool. Neither would quite do the job. We then found a tool available from Classic Chevrolet Parts in Oklahoma City, shown on the right. That one needed to be smoothed some on the grinder and it really needs a better handle. For our purposes a little duct tape softened the hand-held end enough to push the bead in. Even with the tool we found it necessary to use tire machine soap to lube the trim and lock bead so everything would slide together.
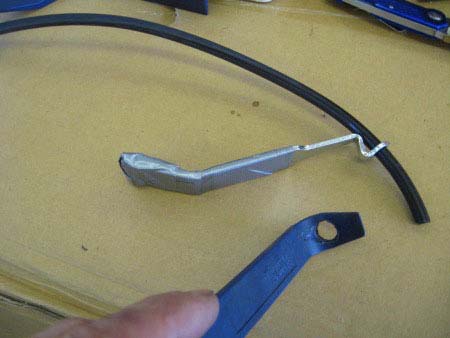
The lock bead goes through the hole in the tool. In this picture the rubber on the left would already be in the center channel of the trim and the tool would be pushed from left to right pushing the bead on the right into the channel.

The extreme pressure it takes to push the lock bead into the channel tends to stretch the bead somewhat. After it was in the channel all the way around we pushed the bead backwards in the channel to take some of the 'stretch' out of it. We let it set a few days and pushed it around some more before trimming the excess. And yes, the duct tape provides cheap insurance against slipping while pushing the bead in with the tool!
Others had warned us to check the spring shackles for wear. In fact, a couple looked a little funny so we took them apart. The shackle pins are basically big threaded screws that turn into their threaded bushings. The pins showed no appreciable wear but the rubber seals were in very poor shape. New ones are on the way and should do a better job of keeping the grease in but dirt and water out.
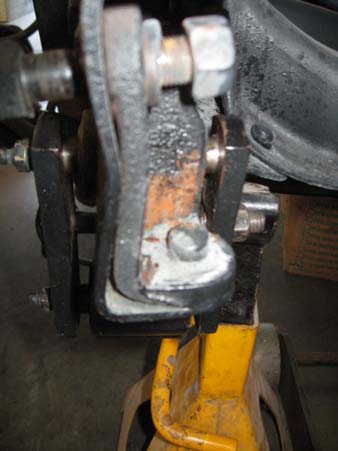
The dark black piece on the right is the spring shackle plate attached to the top pin. The shiny part on the pin is where the rubber needs to go.
In mid-1953 Chevrolet went to vinyl covered wiring rather than the older cloth-and-lacquer covered wires. It was decided to use a reproduction wiring harness which, despite a few challenges, still saved a lot of time. The new harness came already set up for an internally regulated alternator and flashing turn signals. The engine was wired and plumbed enough to reawaken it by running after approximately a year of slumber. Other than a leaky water pump all was good. We would highly recommend this method of revival--that is, run the engine and get all the major adjustments made before reinstalling the front sheet metal.
Jeff at Bowtie Bits in Wichita completely refurbished the gouges. He did an excellent job, including using the 0-30 babbit bearing oil pressure scale and an ammeter range suitable for the 12V alternator.

We finally found an original radio-delete plate in the dash of an old parts truck.

It takes a lot of patience to fit all the little trim items that make the door panels, headliner, windlace, etc. look like they are factory-fresh.
The front fenders and hood were undercoated with a 3M product #08883. It goes on as a medium film and dries to paintable in about an hour. We've used this product several times and not always gotten the same can design, but the number is the same. We hope 3M will continue to make a product like this. It's great for a finished look along with some degree of sound deadening and protection from stone damage.
The edges of the front fenders were sanded and buffed around the cab and grille areas. Other than that, the 'extra' paint was left on in order to provide a little more protection while mounting and doing final things under the hood such as running the heater hoses and headlight wires.
Kind of beginning to look like a truck again with a stock engine compartment!
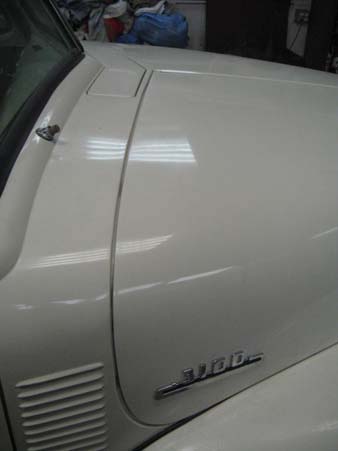
We almost had to use new reproduction hood trim and grille after refinishing everything else. Thankfully, the front hood trim gasket comes oversized rather than undersized.....

....and can be trimmed to fit.
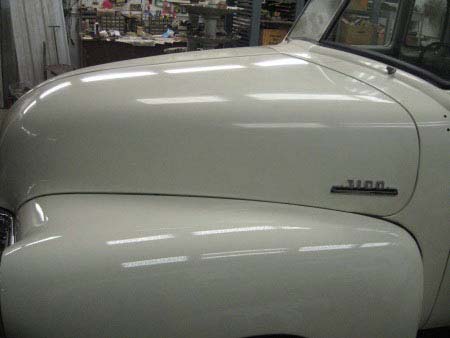
The hood alignment gave us fits. What looked pretty good before the truck was disassembled turned out to not be good enough when everything was freshly refinished.
We tried numerous adjustments on each side. If we got the gaps right, the hood would sit high--higher than the cowl. When we would bring the hood down, the alignment gaps with the cowl and fenders would be awful. On top of that, the best fit put the hood latch in a bind where the hood wouldn't open freely. We finally put a different set of hood hinges on that were not as worn. That was what it took to get the hood right.

The heater hoses could finally be run once we were done with the hood adjustments. This picture also shows one of the terminal blocks for the headlight wiring. These blocks are similar to the originals but have 4 terminals rather than 3. The additional terminal is for the turn signals, which have been added with a second filament in the original style parking light housings.
The truck sneaks out for a test drive to see how everything works.

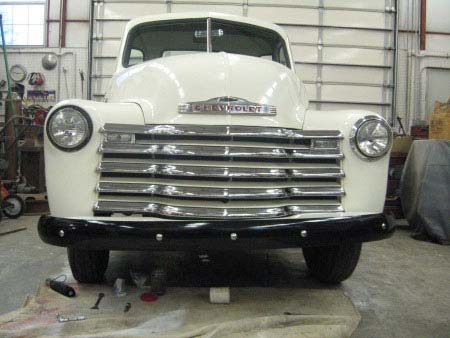
With the under-hood work pretty much done the front fenders were wet sanded to 2000 grit and machine buffed with a medium compound, then swirl remover. Then it was time to install the front bumper.
The truck was missing the front splash apron when we got it. The front bumper had some slight damage and was replaced with a new one. Again, what looked pretty good prior to disassembly wasn't good enough to put back together. This picture was taken after considerable '"adjusting" of the bumper brackets. The splash apron gaps show that, even after some serious adjustment, the bumper is still shifted to the left.
A little more head-on view makes it easier to see the bumper is also high on the driver's side. At this point, as much as we prefer original parts, it appears a pair of reproduction bumper brackets might be the most cost-effective solution.
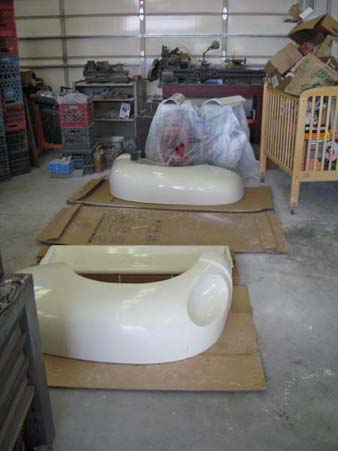
We'd previously blasted and epoxy primed the left rear fender. However it had been damaged before and someone had stretched the metal severely while 'repairing' it. We've been disappointed by price and quality of so many after-market reproduction parts that we decided to fix this one. That's easier than finding a good used one--all of which are over 50 yrs old!
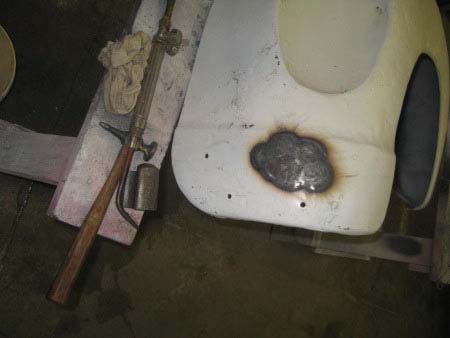
The first step is shrinking the stretched metal. A small area is heated cherry red with the torch. The excess metal is gently tapped from the outside into the red area with a hammer and dolly. Then the heated area is quenched with a wet rag. The rapid cooling causes a visible shrinking right before one's eyes.
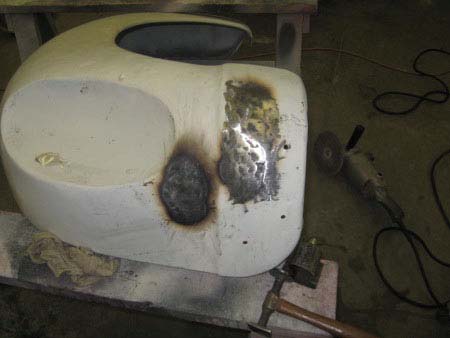
The area being worked is occasionally hit with a grinder to check for the proper shape, identifying any high or low spots.
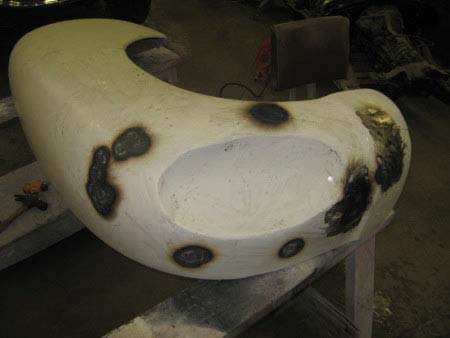
Shrinking the metal just takes patience--working one area at a time.

The steering wheel had cracks at each spoke junction. Each crack was cut back to where the wheel was undamaged--some places to the inner metal ring. The gaps were then filled with epoxy. The wheel was sprayed with a black epoxy primer and then finished with black single stage urethane.
It's often a toss-up; choosing between working with what we have and taking the chance we'll have to work on whatever else we can find in the marketplace. In this case new bumper brackets went a long way toward getting the front bumper and splash apron aligned properly.
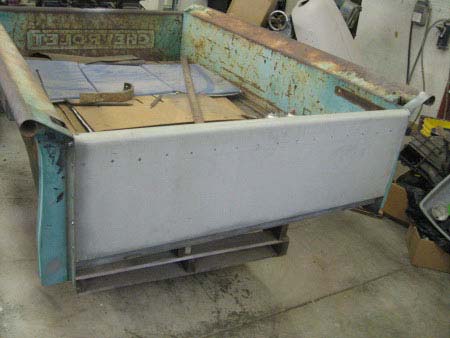
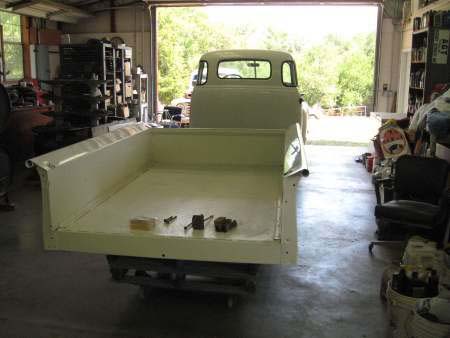
Few people in 1953 bought these trucks just to drive back and forth to the grocery store. Rather, the old trucks wear some signs of their long and faithful service. High quality reproductions of the front bed panel and tailgate are available from Mar-K Industries right in nearby Oklahoma City. That seemed like the best way to go.
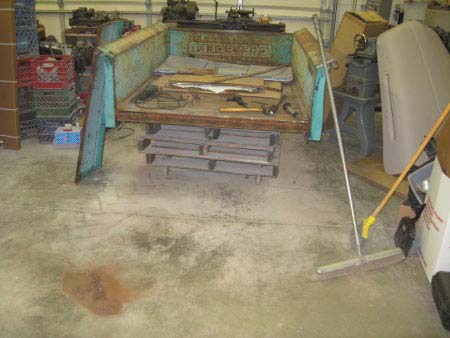
The original bed floor was long gone. Someone had welded in a steel plate, supported by round stock and 'edged' with angle iron. Some surgery was required to remove the old front panel.
A little more corrective surgery was required to get a good fit on the new panel.
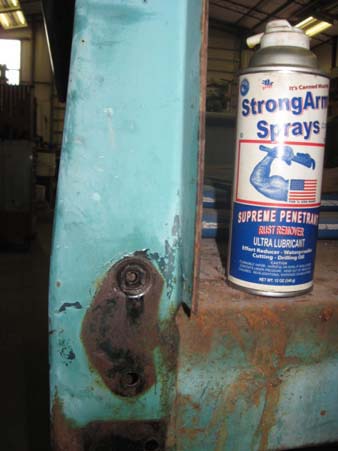
It would seem to be a simple job removing the tailgate. The top bolt on each hinge goes into a captive nut. The excess length of bot sticks out the back of the nut in a place that can't be reached from behind. Fortunately we were able to break each bolt loose. We carefully worked each bolt out and back in about a quarter turn at a time. Each time the bolt was sprayed with StrongArm Spray to carry some lubricant back into the nut. Eventually each came out without damaging the threads of the captive nuts. We were reluctant to use heat in any way for fear of warping the sheet metal.

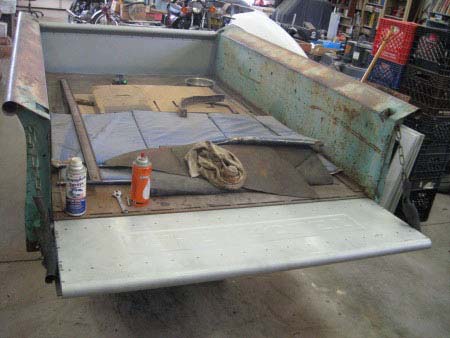
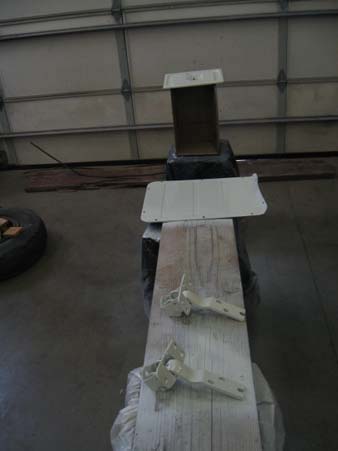
The tailgate was fitted in a similar fashion before any further body work.

The bed and spare tire rack were then sandblasted--in, out and under.
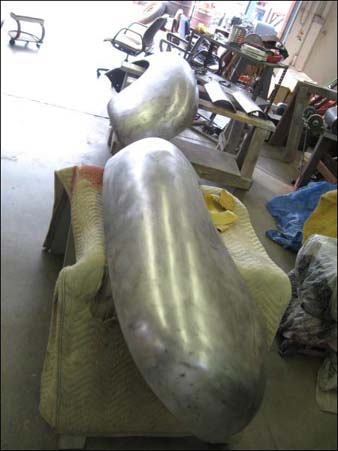
The bed was primed with epoxy primer in preparation for further body work. The underside and tire rack were topcoated with the final color right away to avoid the need to be sanded again. This picture also shows the fenders beginning to return to their original shape.

New tires and tubes were mounted after the 5 original rims were powdercoated. We're toying with the idea of some orange pin stripes to tie in the OSU colors of orange and black. For that reason we're leaving the hubcaps off for now, in case we end up pulling the wheels to spin them (by hand!!) on the balancer while pinstriping. That decision will be made when we can look at the truck overall with the bed and rear fenders back on.
The bed had a plate welded into the floor on the inside. While the inside won't be on display, it also caused damage and warping on the outside. The initial reaction might be to fill all the flaws with plastic filler. Unfortunately, that method doesn't do very well, particularly on a pickup bed. One consideration is the weight and flexing at the mounting points of the fenders. It was realized that a majority of the welding damage is in the areas inside (covered by) the fenders. So, it appears the judicious use of a little filler in the areas that will show can be made to conform with the natural look of the bedsides, as they'll be once the fenders are mounted. This was a hard-learned lesson of the past when a great deal of effort was once expended to get a pickup bed's sides laser-straight only to have them take on a slight warp as the fenders pulled and twisted on them.
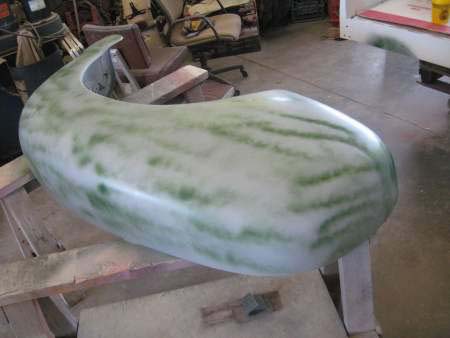
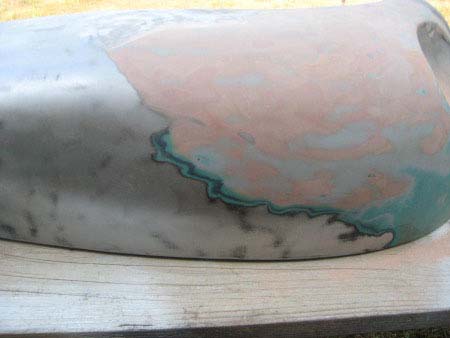
The right rear fender with a guide coat after having been sanded with 180 and reprimed.
The left rear fender after the guide coat was sanded with 320 grit. The only way to get a really nice job is to keep working the steps, always cleaning up the smallest flaws that appear at each stage. Here there are a couple imperfections still, but we're getting close. We ultimately sprayed one more round of fill primer and wet sanded with 400 to get the bed and fenders to where they don't show so many of the indignities suffered over such a long life of use as a truck.
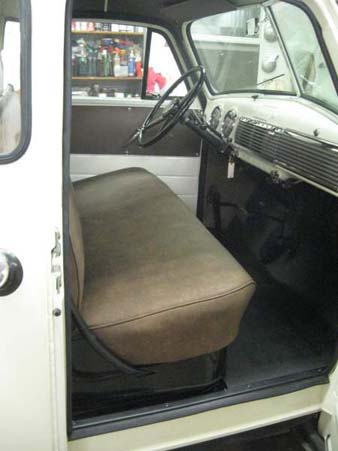
We kept looking at the interior. As nice as it was, it was somehow too busy. We finally realized that we'd painted the cab interior and lower seat frame all the factory white color (see earlier pictures). There were white spots that showed around the floor mat and pedals, etc. We pulled up much of the mat and backing pad spraying the offending areas with semi-gloss black to blend it all in with the rest of the flooring. That gave the simple, uncluttered, all-business look we were after to the interior.
Just two things remain in the interior. One is a reproduction window regulator crank handle that isn't quite like the original. We may end up drilling the regulator shaft slightly to give it a way to stay on with the set screw. The other item is the wiper knob mounted on top of the dash. This is way different from the original knob, but that's what comes with the electric wiper switch. We can't stand the look of the "street rod" style knob and fully intend to come up with a way to mount the original lever--despite the differences in the two switch shafts. ANY AND ALL IDEAS ARE WELCOMED FOR THESE TWO ITEMS!!!!
The bed , tailgate, rear fenders, and side aprons/ valance panels were finally painted with color. The bed had previously been mounted on some wooden blocks and shims with carriage bolts through the steel plate on the bed floor. We'd had to cut the carriage bolts off and will reconstruct a mounting system with the correct-dimensioned reproduction blocks and rubber pads.
The fenders and bed were sprayed with two wet coats of sealer, just like the rest of the truck. We applied an extra coat of color (4 total) to give plenty of material for sanding and buffing since the rear of the truck had so many more little nicks and dings.
Here the bed is set back on the frame with the correct blocks and pads. We're getting carriage bolts of the appropriate lengths and will then loosely hang the fenders, valance panels, and running boards. That will allow us to get the right fits and proportions before tightening anything down.

So far, so good.
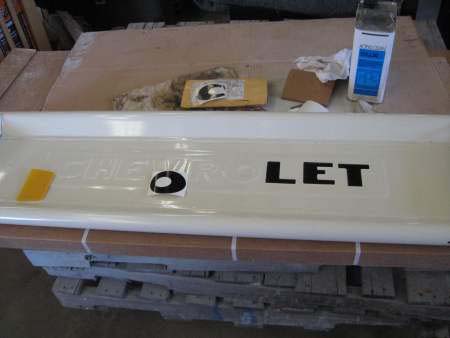
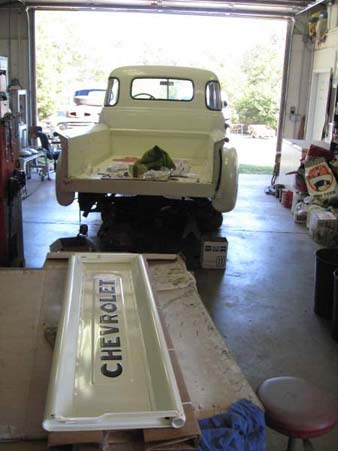
Black letters add a nice contrast to the tailgate.
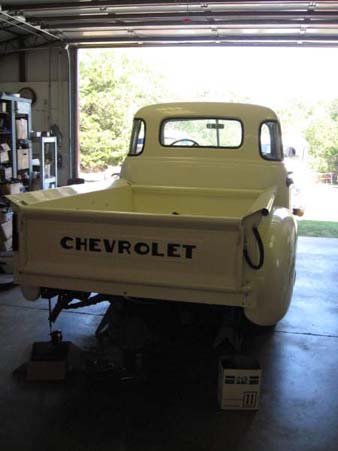
The bed, fenders, and running boards were all shimmed and aligned, then tightened.
Nearly a complete truck again.
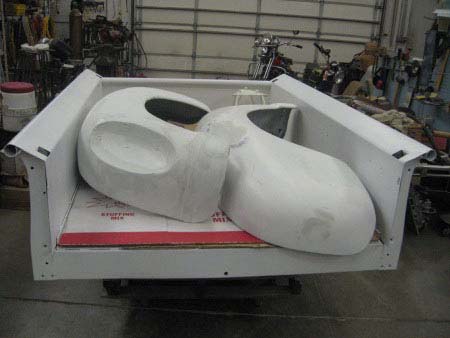
Dr. Panciera at OSU's Center for Veterinary Health Sciences had been working hard on building a clinic box that would have made it possible for a veterinarian to make a living in 1953.

The OSU orange, black, and white on the clinic box show off the school colors. A little orange pin striping by Kelly Horton help tie the whole package together.


The wheel openings and stake pockets also got the attention of the pinstriper's brush.
Plans are underway to fill the clinic box with appropriate period-correct instruments and equipment as part of the "Mobile Museum."
The doors and sides of the clinic box still have plenty of room for some appropriate signage!
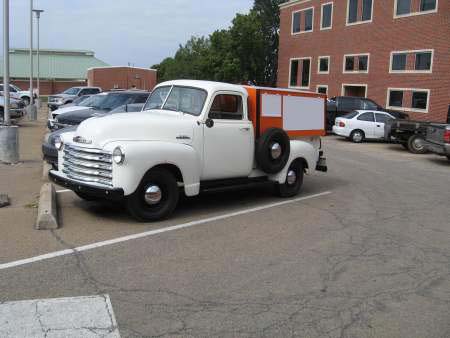
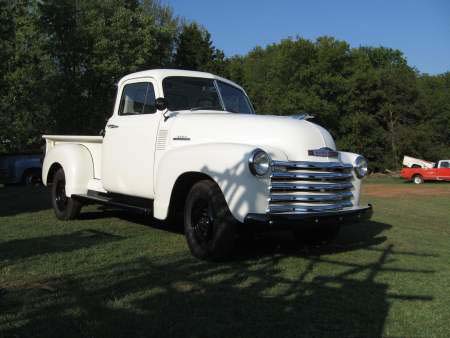
Finally, in the parking lot at the Vet School. A 60 year old truck in time to celebrate the 60th anniversary of the first graduating class.
THANKS AGAIN TO THE CLASS OF 1970 WHO MADE THIS ALL POSSIBLE!!!!! |